전통적인 머신러닝 모델 (실험적 성격)#
Xinference를 사용하여 전통적인 머신러닝 모델을 추론하는 방법을 알아보세요. Xinference에서 이러한 유연하고 확장 가능한 모델을 **유연 모델**이라고 합니다.
Added in version v1.7.1: 이 기능은 v1.7.1 버전부터 공개되었으며, 현재 API가 안정적이지 않아 후속 반복에서 변경될 수 있습니다.
소개#
전통적인 머신러닝 모델은 대규모 모델을 중심으로 한 생태계에서 여전히 중요한 역할을 할 수 있습니다.
Xinference는 기존 머신러닝 모델을 추론하기 위한 유연한 확장 기능을 제공합니다. 다음 유형의 모델을 로드하고 실행할 수 있는 기능이 내장되어 있습니다:
HuggingFace Pipeline을 사용하면 HuggingFace에서 호스팅하는 모델을 분류 등의 작업에 활용할 수 있습니다.
ModelScope의 모델을 사용하는 ModelScope Pipeline은 분류 등의 작업에 사용할 수 있습니다.
YOLO는 이미지 감지 및 관련 컴퓨터 비전 작업에 사용됩니다.
Xinference는 다양한 전통적인 기계 학습 모델을 지원합니다. 위의 각 범주에 대해 대표적인 예제를 통해 Xinference 플랫폼에서 추론을 수행하는 방법을 단계별로 설명하겠습니다.
내장 모델 지원 사례#
HuggingFace Pipeline 모델#
먼저, FacebookAI/roberta-large-mnli 를 예로 들어보겠습니다. 이 모델은 제로샷 분류 모델에 속합니다. 다른 유형의 모델을 등록할 때는 해당 작업(또한 Pipeline의 매개변수)만 지정하면 됩니다.
다음 경로에 모델을 다운로드하십시오:
/path/to/roberta-large-mnli
다음으로, Xinference Web UI에서 이 유연 모델을 등록하는 방법을 시연하겠습니다. 이후 예제에서는 필요하지 않은 경우 인터페이스 조작을 생략하고 핵심 로직에 집중하겠습니다.
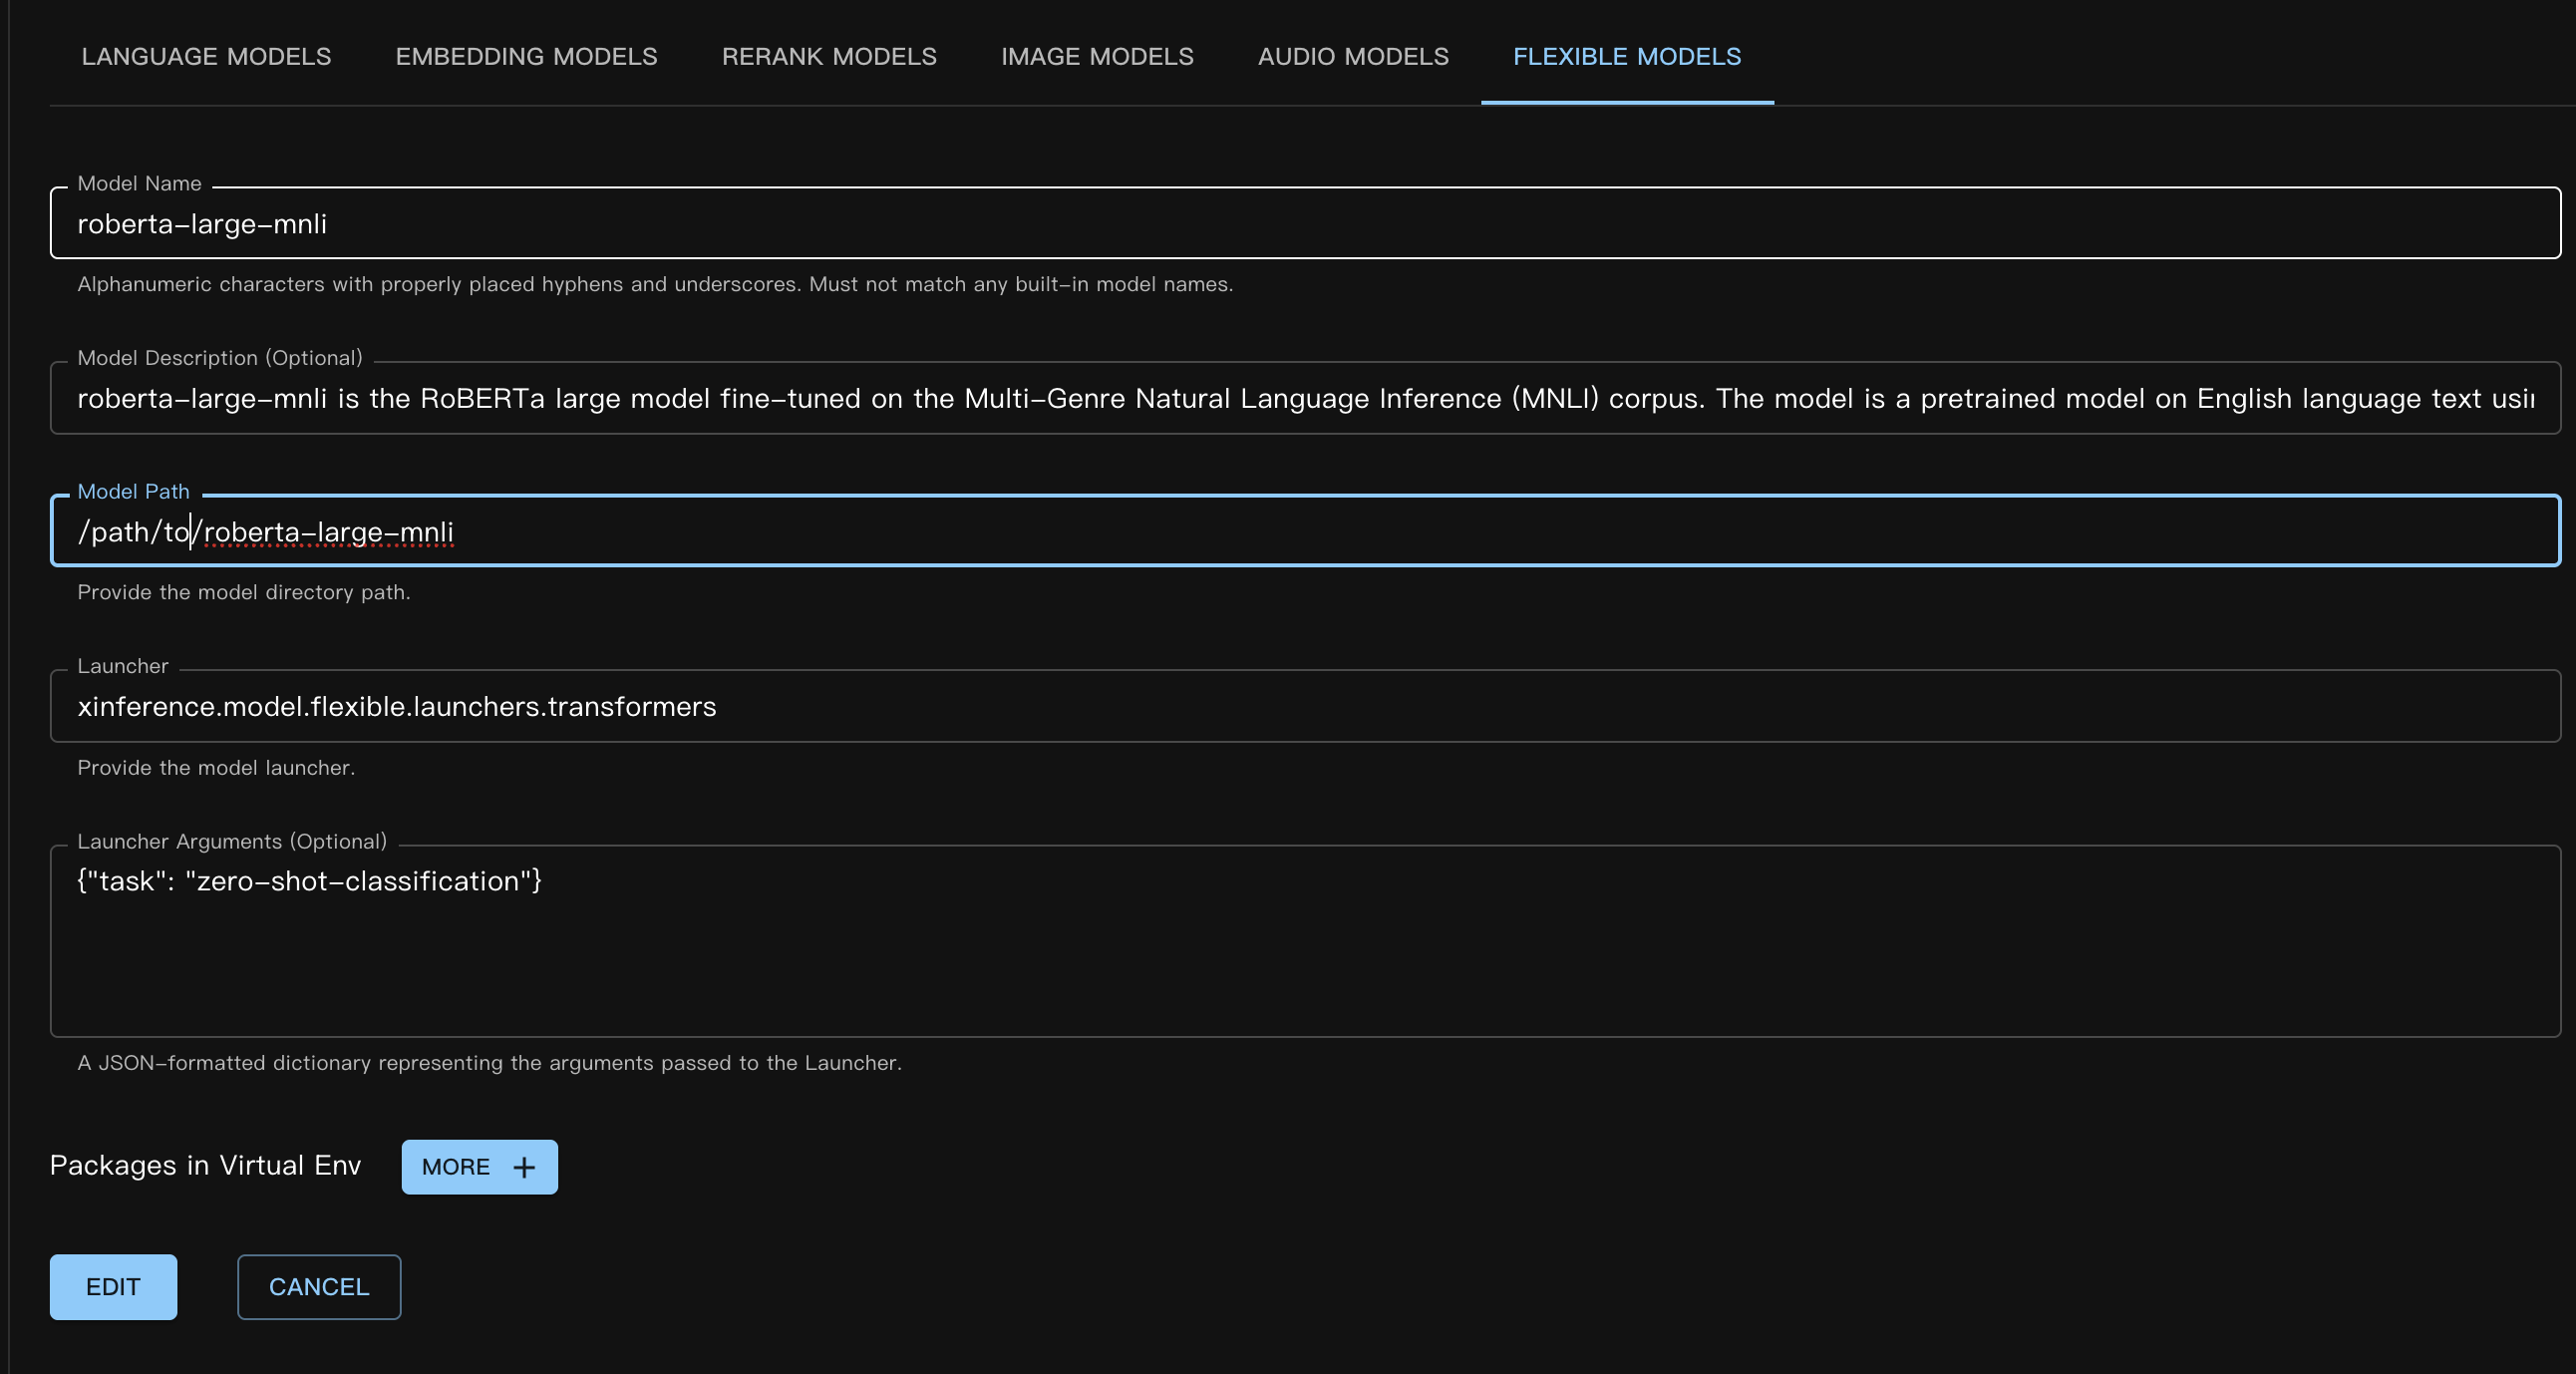
해당 사용자 정의 모델 JSON 파일은 다음과 같습니다:
{
    "model_name": "roberta-large-mnli",
    "model_id": null,
    "model_revision": null,
    "model_hub": "huggingface",
    "model_description": "roberta-large-mnli is the RoBERTa large model fine-tuned on the Multi-Genre Natural Language Inference (MNLI) corpus. The model is a pretrained model on English language text using a masked language modeling (MLM) objective.",
    "model_uri": "/path/to/roberta-large-mnli",
    "launcher": "xinference.model.flexible.launchers.transformers",
    "launcher_args": "{\"task\": \"zero-shot-classification\"}",
    "virtualenv": {
        "packages": [],
        "inherit_pip_config": true,
        "index_url": null,
        "extra_index_url": null,
        "find_links": null,
        "trusted_host": null,
        "no_build_isolation": null
    },
    "is_builtin": false
}
장 register_custom_model 섹션을 참조하여 코드나 명령줄을 통해 모델을 등록하는 방법을 확인하세요.
다음으로, Web UI에서 시작 모델 / 사용자 정의 모델 / **유연 모델**을 선택하여 모델을 로드합니다. 로드 과정은 다른 모델 유형과 동일합니다.
명령줄을 사용할 때는 --model-type flexible 매개변수를 반드시 지정하세요.
모델이 성공적으로 로드된 후, 다음과 같은 방식으로 추론을 수행할 수 있습니다.
curl -X 'POST' \
  'http://<XINFERENCE_HOST>:<XINFERENCE_PORT>/v1/flexible/infers' \
  -H 'accept: application/json' \
  -H 'Content-Type: application/json' \
  -d '{
    "model": "roberta-large-mnli",
    "args": [
      "one day I will see the world",
      ["travel", "cooking", "dancing"]
    ]
  }'
from xinference.client import Client

client = Client("http://<XINFERENCE_HOST>:<XINFERENCE_PORT>")

model = client.get_model("roberta-large-mnli")

sequence_to_classify = "one day I will see the world"
candidate_labels = ['travel', 'cooking', 'dancing']
model.infer(sequence_to_classify, candidate_labels)
{"sequence":"one day I will see the world","labels":["travel","cooking","dancing"],"scores":[0.9799638986587524,0.010605016723275185,0.009431036189198494]}
ModelScope Pipeline 모델#
ModelScope Pipeline 모델은 Huggingface 모델과 매우 유사하며, 유일한 차이점은 사용하는 launcher가 다르다는 점입니다.
ModelScope의 제로 샷 분류 모델을 예로 들어 보겠습니다. 모델은 `iic/nlp_structbert_zero-shot-classification_chinese-base <https://modelscope.cn/models/iic/nlp_structbert_zero-shot-classification_chinese-base>`_입니다.
여기서 우리는 Xinference의 모델 가상 환경 기능을 사용했습니다. 이 예시에서 사용된 모델이 정상적으로 작동하려면 ``transformers==4.50.3``이 필요하기 때문입니다. 실행 환경을 분리하기 위해 모델 등록 시 :ref:`가상 환경 <model_virtual_env>`을 사용했습니다.
모델 등록 시 사용자 정의 패키지를 지정하는 구문은 일반 패키지와 동일하지만, 몇 가지 특수한 경우가 있습니다. 가상 환경이 여전히 Xinference가 실행 중인 Python 인터프리터의 site-packages를 기반으로 하기 때문에, ``#system_numpy#``를 명시적으로 포함해야 합니다. 패키지 이름을 ``#system_xx#``로 감싸서 가상 환경 생성 시 기본 환경과 일관성을 유지해야 하며, 그렇지 않으면 런타임 오류가 쉽게 발생할 수 있습니다.
등록 방식 (Web UI):
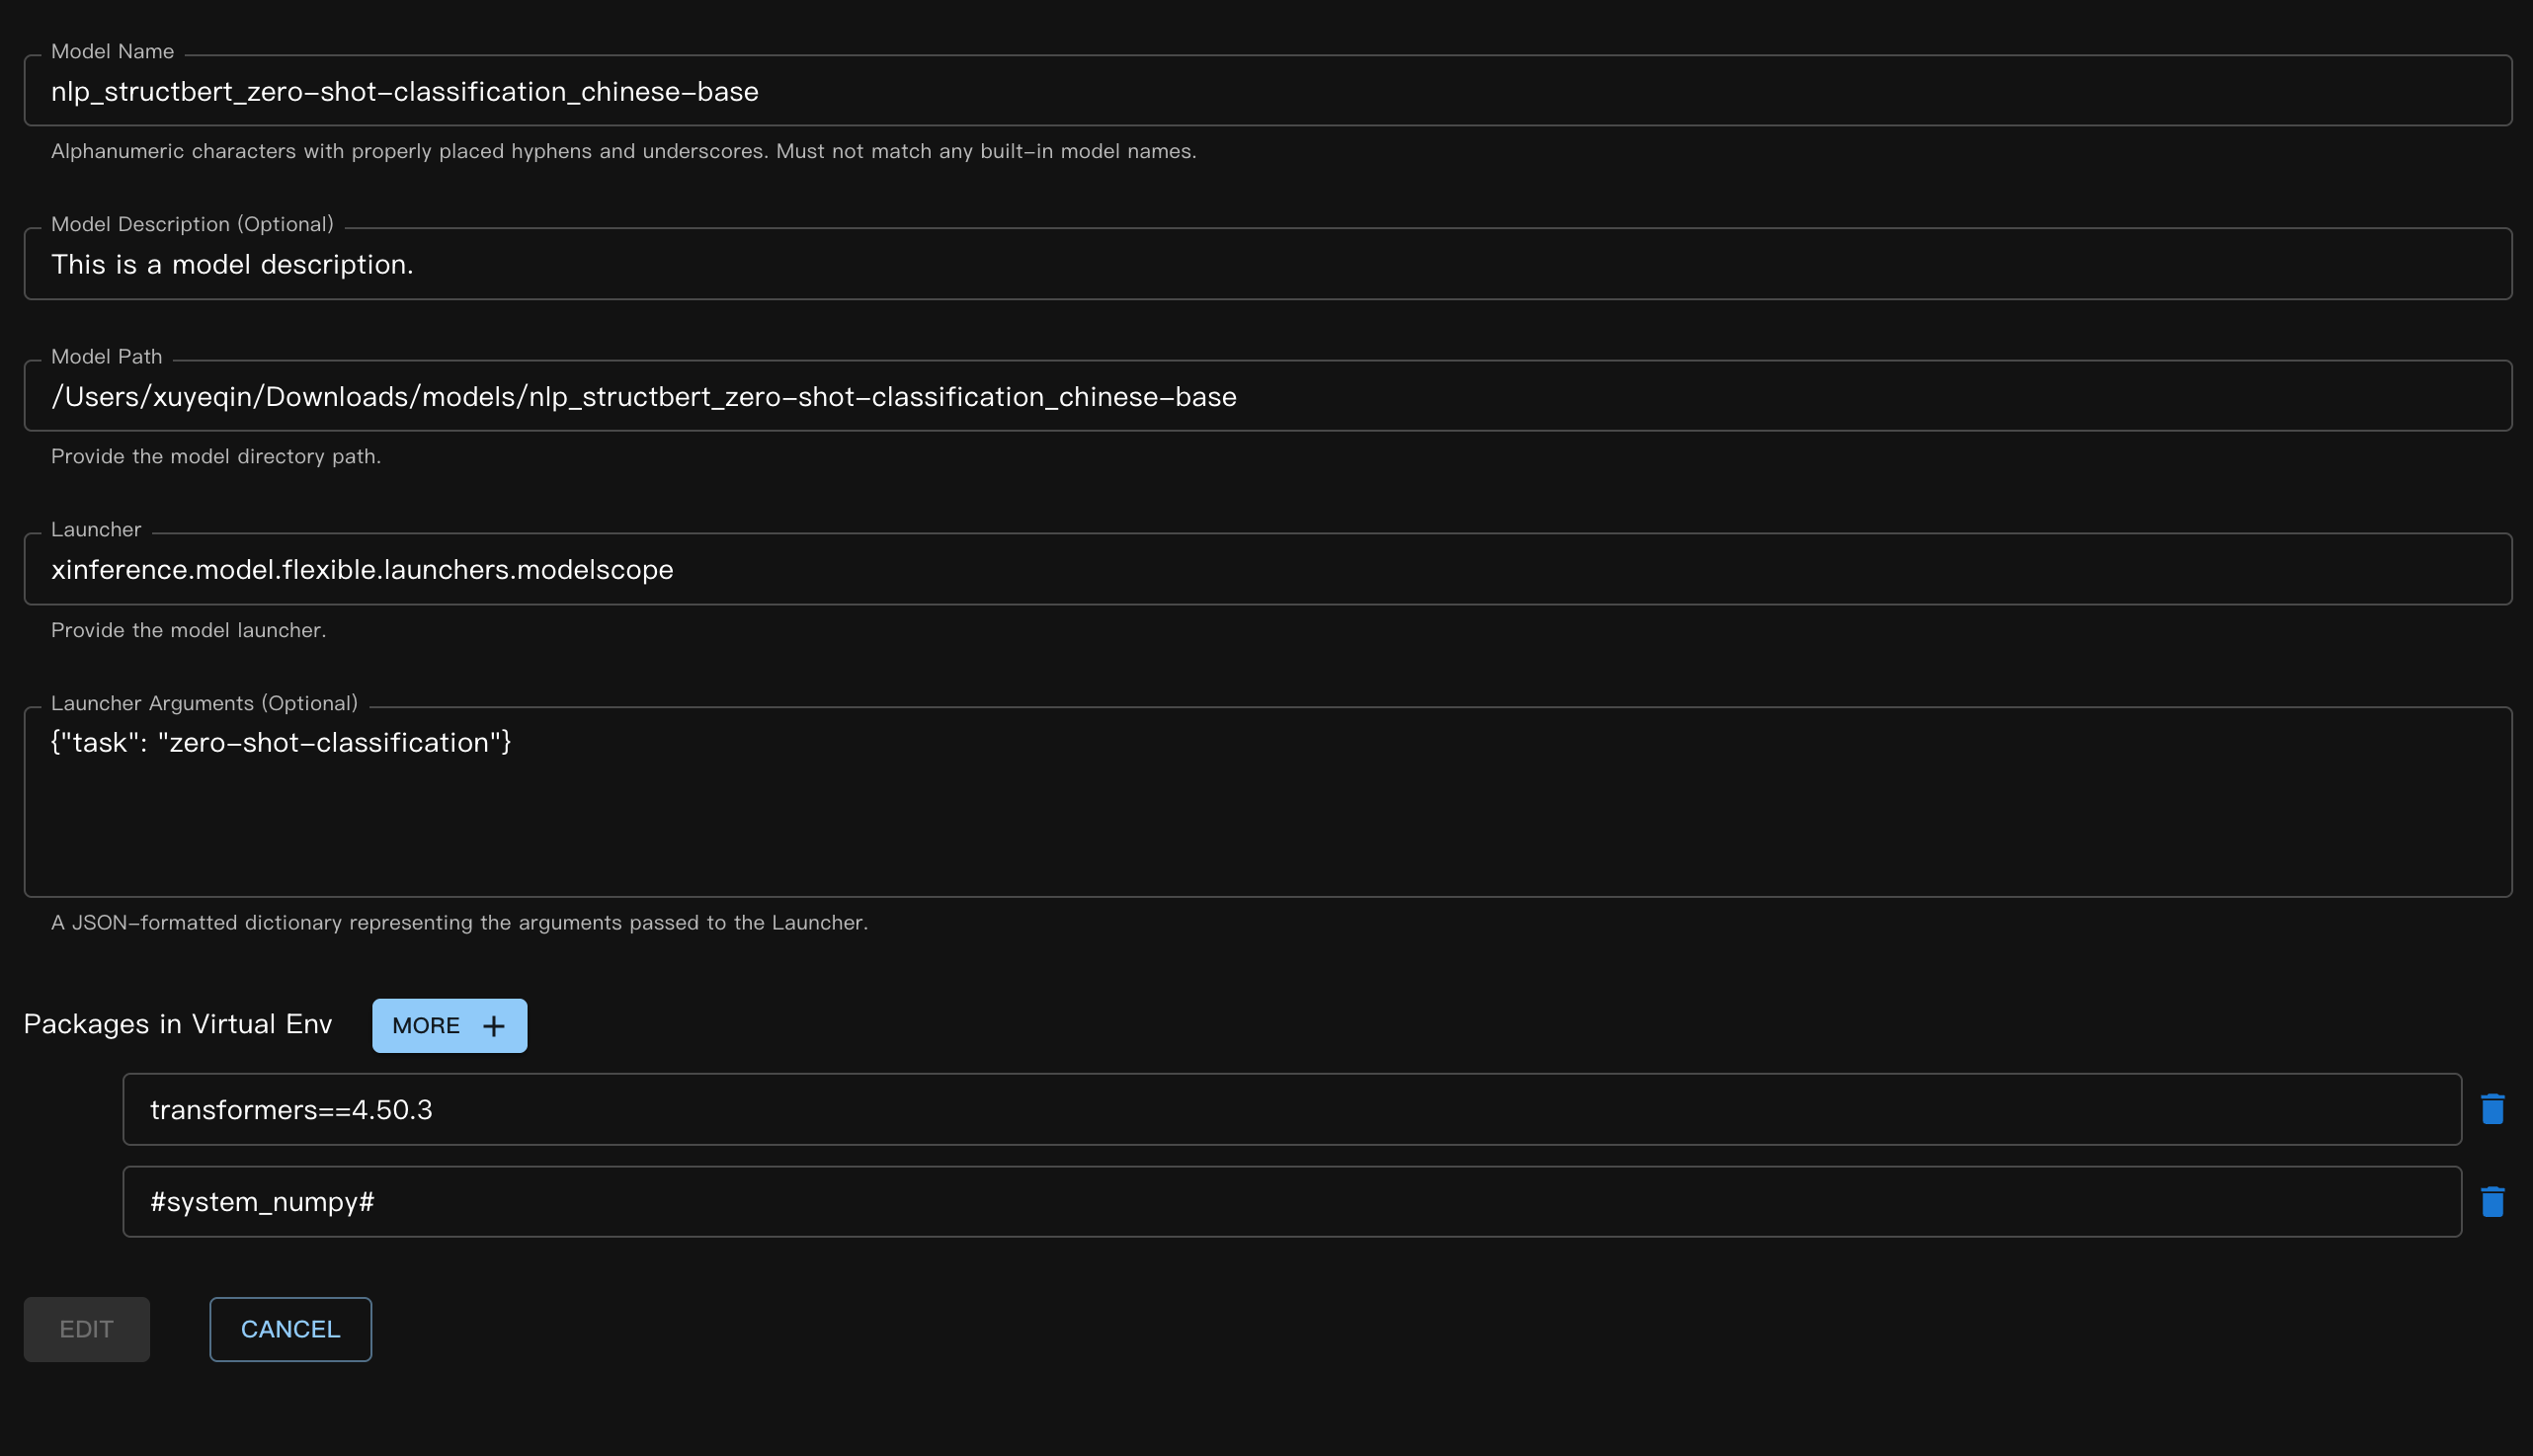
해당하는 JSON 파일:
{
    "model_name": "nlp_structbert_zero-shot-classification_chinese-base",
    "model_id": null,
    "model_revision": null,
    "model_hub": "huggingface",
    "model_description": "This is a model description.",
    "model_uri": "/Users/xuyeqin/Downloads/models/nlp_structbert_zero-shot-classification_chinese-base",
    "launcher": "xinference.model.flexible.launchers.modelscope",
    "launcher_args": "{\"task\": \"zero-shot-classification\"}",
    "virtualenv": {
        "packages": [
            "transformers==4.50.3",
            "#system_numpy#"
        ],
        "inherit_pip_config": true,
        "index_url": "https://mirrors.tuna.tsinghua.edu.cn/pypi/web/simple",
        "extra_index_url": null,
        "find_links": null,
        "trusted_host": null,
        "no_build_isolation": null
    },
    "is_builtin": false
}
모델 추론:
curl -X 'POST' \
  'http://<XINFERENCE_HOST>:<XINFERENCE_PORT>/v1/flexible/infers' \
  -H 'accept: application/json' \
  -H 'Content-Type: application/json' \
  -d '{
    "model": "nlp_structbert_zero-shot-classification_chinese-base",
    "args": [
      "世界那么大,我想去看看"
    ],
    "candidate_labels": ["家居", "旅游", "科技", "军事", "游戏", "故事"]
  }'
from xinference.client import Client

client = Client("http://<XINFERENCE_HOST>:<XINFERENCE_PORT>")

model = client.get_model("nlp_structbert_zero-shot-classification_chinese-base")

labels = ['家居', '旅游', '科技', '军事', '游戏', '故事']
sentence = '世界那么大,我想去看看'
model.infer(sentence, candidate_labels=labels)
{"labels":["旅游","故事","游戏","家居","科技","军事"],"scores":[0.5115892291069031,0.1660086065530777,0.11971458047628403,0.08431519567966461,0.06298774480819702,0.05538458004593849]}%
YOLO#
YOLO는 실시간 객체 탐지 모델로, 이미지 검출 및 비디오 분석场景에서 널리 사용됩니다.
먼저, YOLO 가중치를 다운로드합니다. 여기서는 yolov11s.pt 파일을 예로 듭니다.
모델 정의 JSON 파일:
{
    "model_name": "yolo11s",
    "model_id": null,
    "model_revision": null,
    "model_hub": "huggingface",
    "model_description": "YOLO is a popular real-time object detection model, widely used in image detection and video analysis scenarios.",
    "model_uri": "/Users/xuyeqin/Downloads/models/yolo11s.pt",
    "launcher": "xinference.model.flexible.launchers.yolo",
    "launcher_args": "{}",
    "virtualenv": {
        "packages": [
            "ultralytics",
            "#system_numpy#"
        ],
        "inherit_pip_config": true,
        "index_url": "https://mirrors.tuna.tsinghua.edu.cn/pypi/web/simple",
        "extra_index_url": null,
        "find_links": null,
        "trusted_host": null,
        "no_build_isolation": null
    },
    "is_builtin": false
}
모델 추론:
import requests
from PIL import Image
import io
import base64
from xinference.client import Client

client = Client("http://<XINFERENCE_HOST>:<XINFERENCE_PORT>")
model = client.get_model("yolo11s")

url = "https://ultralytics.com/images/bus.jpg"

response = requests.get(url)
response.raise_for_status()

img = Image.open(io.BytesIO(response.content))

buffered = io.BytesIO()
img.save(buffered, format="JPEG")
img_bytes = buffered.getvalue()
img_base64 = base64.b64encode(img_bytes).decode('utf-8')

model.infer(source=img_base64)
[[{'name': 'bus',
   'class': 5,
   'confidence': 0.93653,
   'box': {'x1': 13.9521, 'y1': 227.0665, 'x2': 800.17688, 'y2': 739.13965}},
  {'name': 'person',
   'class': 0,
   'confidence': 0.89741,
   'box': {'x1': 669.89709,
    'y1': 389.82065,
    'x2': 809.58966,
    'y2': 879.65491}},
  {'name': 'person',
   'class': 0,
   'confidence': 0.88205,
   'box': {'x1': 52.37262, 'y1': 397.83792, 'x2': 248.506, 'y2': 905.98212}},
  {'name': 'person',
   'class': 0,
   'confidence': 0.8706,
   'box': {'x1': 222.58685,
    'y1': 405.93442,
    'x2': 345.02032,
    'y2': 859.52789}},
  {'name': 'person',
   'class': 0,
   'confidence': 0.66505,
   'box': {'x1': 0.28522, 'y1': 548.60931, 'x2': 81.25904, 'y2': 871.59076}}]]
사용자 정의 유연 모델 작성#
먼저, 감정 점수를 위한 간단한 사용자 정의 런처를 구현했습니다. 이 예제에서는 실제 모델 가중치를 사용하지 않으므로 load 함수는 모델 로드 작업을 수행하지 않습니다.
# my_flexible_model.py

from xinference.model.flexible import FlexibleModel


class RuleBasedSentimentModel(FlexibleModel):
    def load(self):
        self.pos_words = self.config.get("pos", ["good", "happy", "great"])
        self.neg_words = self.config.get("neg", ["bad", "sad", "terrible"])

    def infer(self, text: str):
        score = 0
        words = text.lower().split()
        for w in words:
            if w in self.pos_words:
                score += 1
            elif w in self.neg_words:
                score -= 1
        return {"score": score}


def launcher(model_uid: str, model_spec: FlexibleModel, **kwargs) -> FlexibleModel:
    # get model path,
    # in this example, we do not use it, so it's empty
    model_path = model_spec.model_uri
    return RuleBasedSentimentModel(model_uid=model_uid, model_path=model_path, config=kwargs)
모델 JSON 정의는 다음과 같습니다:
{
    "model_name": "my-flexible-model",
    "model_id": null,
    "model_revision": null,
    "model_hub": "huggingface",
    "model_description": "This is a model description.",
    "model_uri": "/path/to/model",
    "launcher": "my_flexible_model.launcher",
    "launcher_args": "{\"pos\": [\"good\", \"happy\", \"great\", \"nice\"]}",
    "virtualenv": {
        "packages": [],
        "inherit_pip_config": true,
        "index_url": null,
        "extra_index_url": null,
        "find_links": null,
        "trusted_host": null,
        "no_build_isolation": null
    },
    "is_builtin": false
}
여기서는 사용자 정의 pos 값을 전달하여 모델을 확장했습니다.
마지막으로, 결과를 확인해 봅시다:
from xinference.client import Client

client = Client("http://127.0.0.1:9997")

model = client.get_model("my-flexible-model")

model.infer("I feel nice and am happy today")
{'score': 2}
결론#
Xinference에 내장된 유연한 모델 실행기는 Github 에서 찾을 수 있으며, 더 많은 전통적인 머신러닝 모델 지원을 위한 기여를 환영합니다!